Shattered Dreams
A work in progress…
Step 1 – Prepare the sandwich
First, I sandwiched a sheet of red glass between 4 layers of fiber paper (2 above, 2 below) and placed it on the concrete garage floor. The extra layers just provide some additional cushion so that it’s less likely that the hammer will punch a hole right through the fiber paper, which will happen if it’s just one layer between the glass and the floor. I also placed some weights (kiln bricks) around the perimeter of the sandwich, pinching the open edges of the fiber together. The first time, I did not do this and the impact caused some shards to shoot out the sides.
Step 2 – SMASH!
Just one, solid blow directly to the center of the glass. This should be about the strength that you’d hit a normal nail into a normal board. Heavier than if you were just starting a nail in the board, but not so heavy that it pulverizes the glass into a powder and punches a hole straight through the fiber.
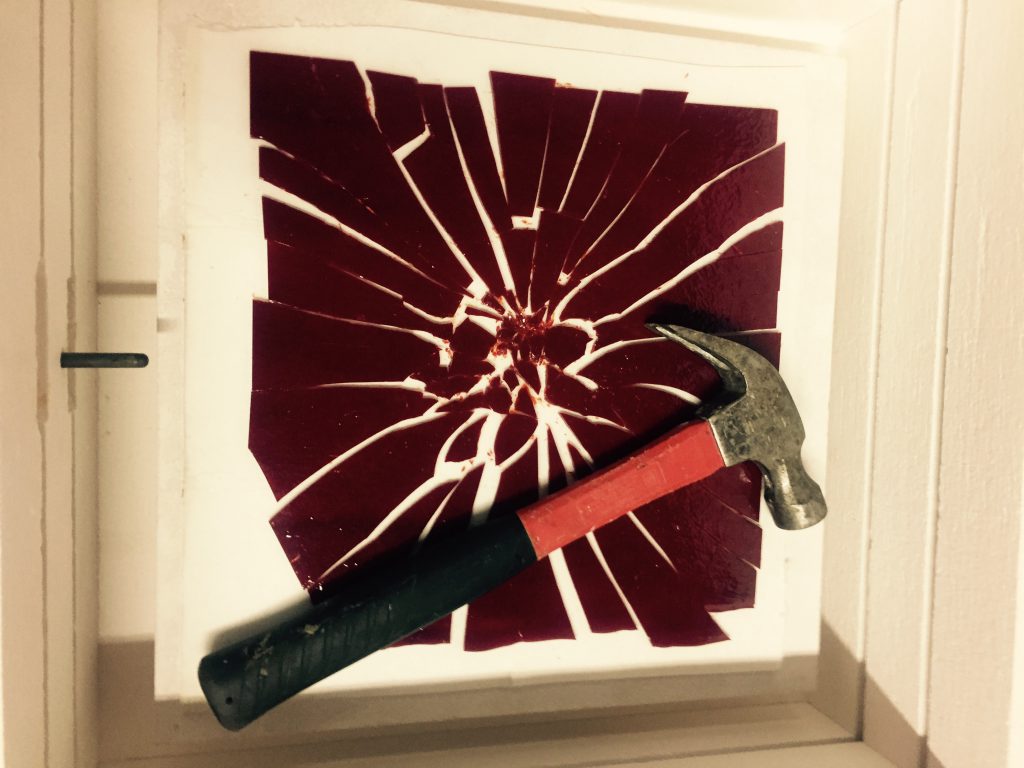
Here’s the piece after impact. All but one layer of fiber paper has been removed, and the remaining sheet was carefully transported onto a kiln shelf. Also featured: the hammer.
Step 3 – Layup
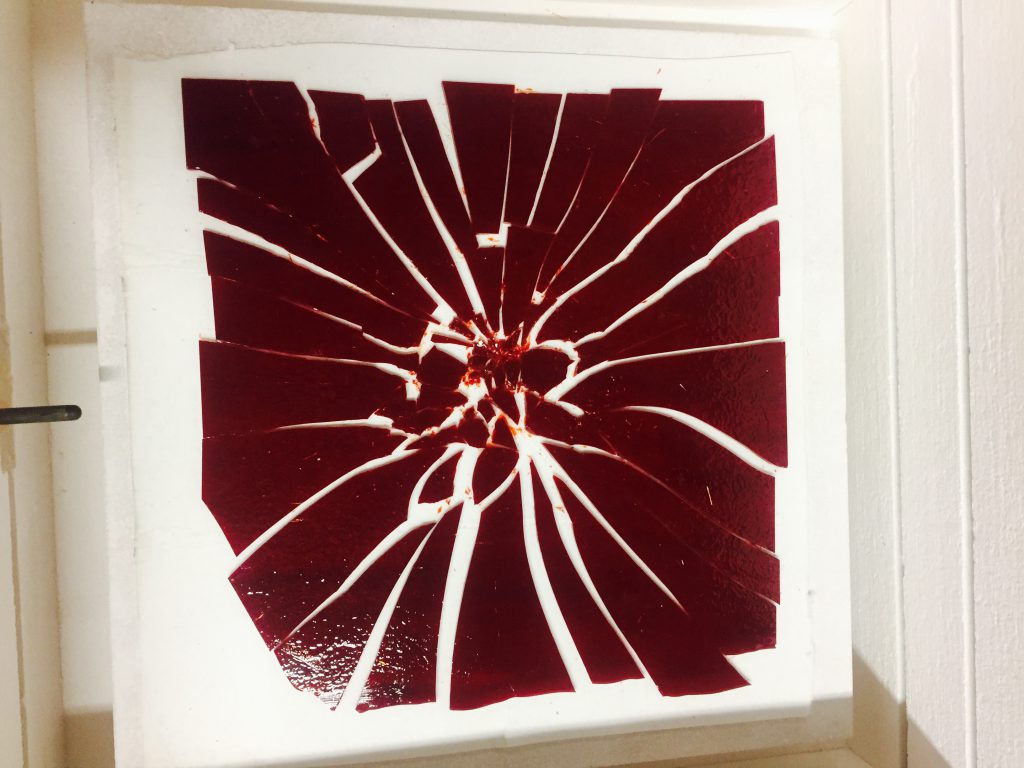
Next, layout the glass the way you want it on the shelf. If you want distinct cracks to be visible, make sure to spread the shards wide enough… remember, during the full fuse, the shards will spread out a bit again, and they’ll appear to seal up the smaller cracks, so exaggerate the gaps now.
Step 4 – Tack Fuse
Now, place a sheet of 3mm clear on top of the shattered piece, and fire to a TACK fuse. I used process temperature 1350F for 10 minutes (which might have been a little much, actually). The goal in this first fire is not to produce a final piece, but rather to “lock” all of the shards in place.
Step 5 – Cleanup
Remove the piece from the kiln and peel off the fiber paper. There will be a layer of fuzzy residue stuck to the shard layer, which you’ll have to carefully wash off (water and a sponge). Be careful here… the edges of the shards are still really sharp, and it’s likely that pieces of fiber fluff and sponge will get stuck in the cracks. Make sure to inspect carefully and remove all contaminants before proceeding. Clean both sides of the glass with your favorite fuse-friendly glass cleaner, and then proceed to the next step.
Step 5 – Fill the Gaps
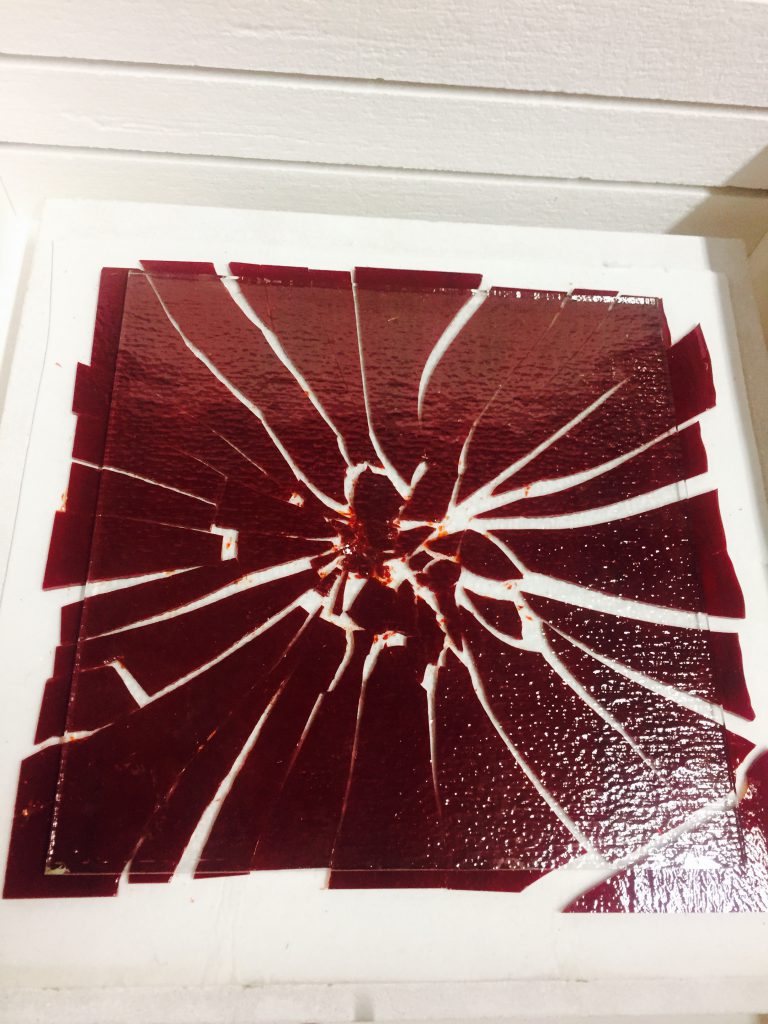
We need to add some material inside the cracks to prevent the shards from simply melting back together. Flip over the sheet so that the shattered pieces are facing upward and fill with frit. This is an opportunity for special effects… if you want to mix in frit of different colors or opacity, this is your chance. I was thinking of adding some black coarse frit to the center of the impact region to make it look like an explosion, but I didn’t have any on-hand.
I just filled with clear frit of varying grades. I started by adding coarse frit into the widest gaps, then filled as much as I could with medium, and finally rubbed clear powder between the narrowest cracks. The hope was that the larger chunks of frit would result in less bubbles, so I’d use them as much as possible. This process was tedious and difficult, as the larger pieces of frit tended to jump out of the cracks as I filled in with the smaller stuff. Next time, I’m going to try doing everything with fine frit or powder, as it would be much easier to uniformly work into the cracks, and just do a nice long bubble squeeze at 1250F.
Note: since there are air gaps within the frit, I piled the frit high in the gaps so that, as it melts down, it pushes the red pieces apart. It’s important to get as much mass as possible within the crack, without piling it on the shards (which would force them to expand).
Step 6 – Full fuse
With the clear side down, fire to a full fuse (1490F) on ThinFire or a kiln-washed shelf.
So you wanted a “shattered glass” effect, eh? Be careful what you wish for…
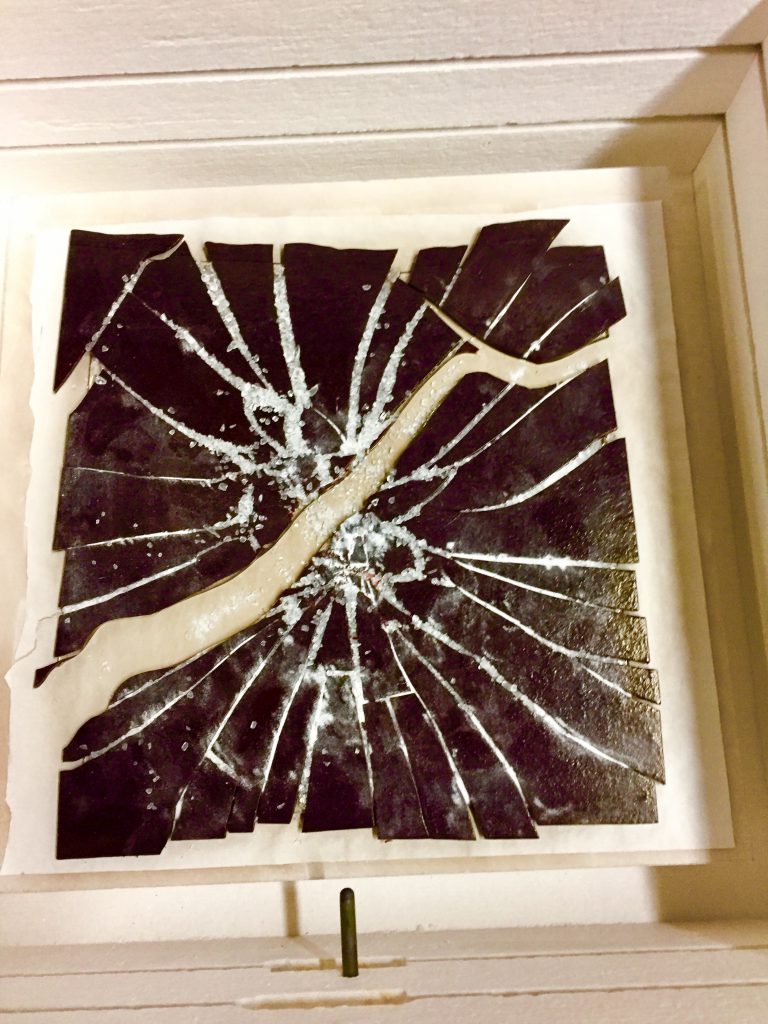
Apparently I’d gotten somewhat cocky with my fusing schedule. I’ve been running my initial ramp to 1250F at a rate of 600 degrees/hour, instead of the recommended 300 degrees/hour. This has been risky but successful for most projects… this one is different because there are such distinct changes in thickness between the parts of with one layer of glass and the parts with 2 layers. Unless the whole mass heats evenly, there’s a good chance it’ll fail and, as in this case, explode apart (there’s now a 1 inch gap in some places). I noticed this at around the 700F mark in the ramp-up, so fortunately nothing had started to melt let. I let it cool and put it all back together, filled the new gap with frit again, and re-fired with a proper 300 degrees/hour ramp-up.
Results: Stay tuned
You must log in to post a comment.